
Setting up the EarEqual BCR
How to connect BCR and take a measurement. Read the safety warning below before you plug anything in for the first time.
What you need
EarEqual BCR is a measurement microphone, not a headset. To use it you need an input that supplies plug-in power. For full functionality, keep the left and right microphones as two separate input channels.
- Low-cost full stereo: the BOYA BY-K4 accepts BCR's 3.5 mm TRS stereo microphone signal and sends separate left/right channels over USB-C. Where the host supports the device correctly, it is an inexpensive full-stereo route and is widely available, including through Amazon.
- Portable full stereo: a recorder such as the Tascam DR-05XP provides a stereo plug-in-power microphone input and standalone binaural recording.
- Calibration-only fallback: a normal headset-style mono microphone input can be used by electrically combining the two BCR microphones and measuring left and right sequentially.
- Professional XLR interfaces: do not connect BCR directly. Use a suitable plug-in-power adapter such as the RØDE VXLR+ between BCR and the phantom-powered XLR input.
How BCR is wired
EarEqual BCR ends in a single 3.5 mm TRS connector carrying two independent microphone lines, one for each ear, plus a shared ground. This is why it doubles as a binaural rig.
Adapters are standard, off-the-shelf parts and are not supplied with BCR. Which one you need depends on whether your device has a stereo mic input or a single (mono / headset-style) input, see the two paths below.
Three ways to connect
BOYA BY-K4 to USB-C
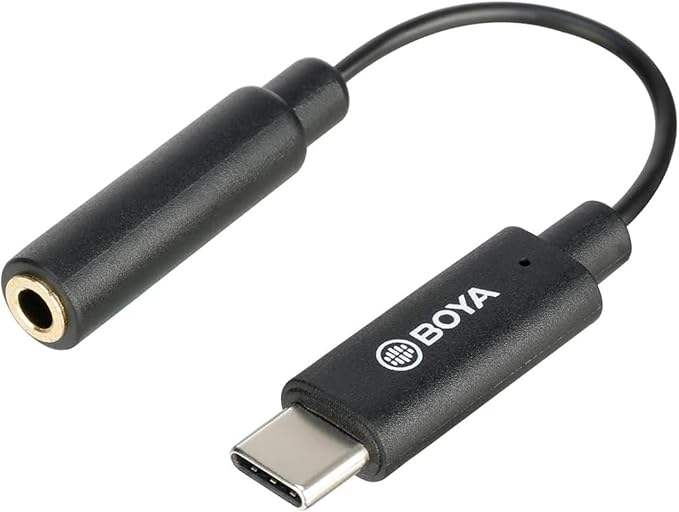
Connect BCR directly to the BOYA BY-K4, then connect the BY-K4 to USB-C. On compatible hosts, the adapter keeps BCR's left and right microphones as separate USB audio channels.
For binaural recording: connect to a smartphone, tablet or computer and record the two microphone channels in a stereo-capable recording application.
For headphone calibration on a computer: use the BY-K4 for the two microphone input channels and the computer's normal headphone output for the left/right measurement sweeps.
Where the host recognizes the BY-K4 as a stereo microphone input, this gives full stereo EarEqual operation without a dedicated recorder or conventional audio interface.
Portable stereo recorder
Tascam DR-05XP is a straightforward standalone option. It has a stereo 3.5 mm microphone input with plug-in power and can also operate as a 2-in/2-out USB audio interface.
Zoom H1essential is a comparable alternative. For professional setups, the Sound Devices MixPre-3 series also provides a suitable two-channel 3.5 mm microphone input with plug-in power.
A single headset-style microphone input
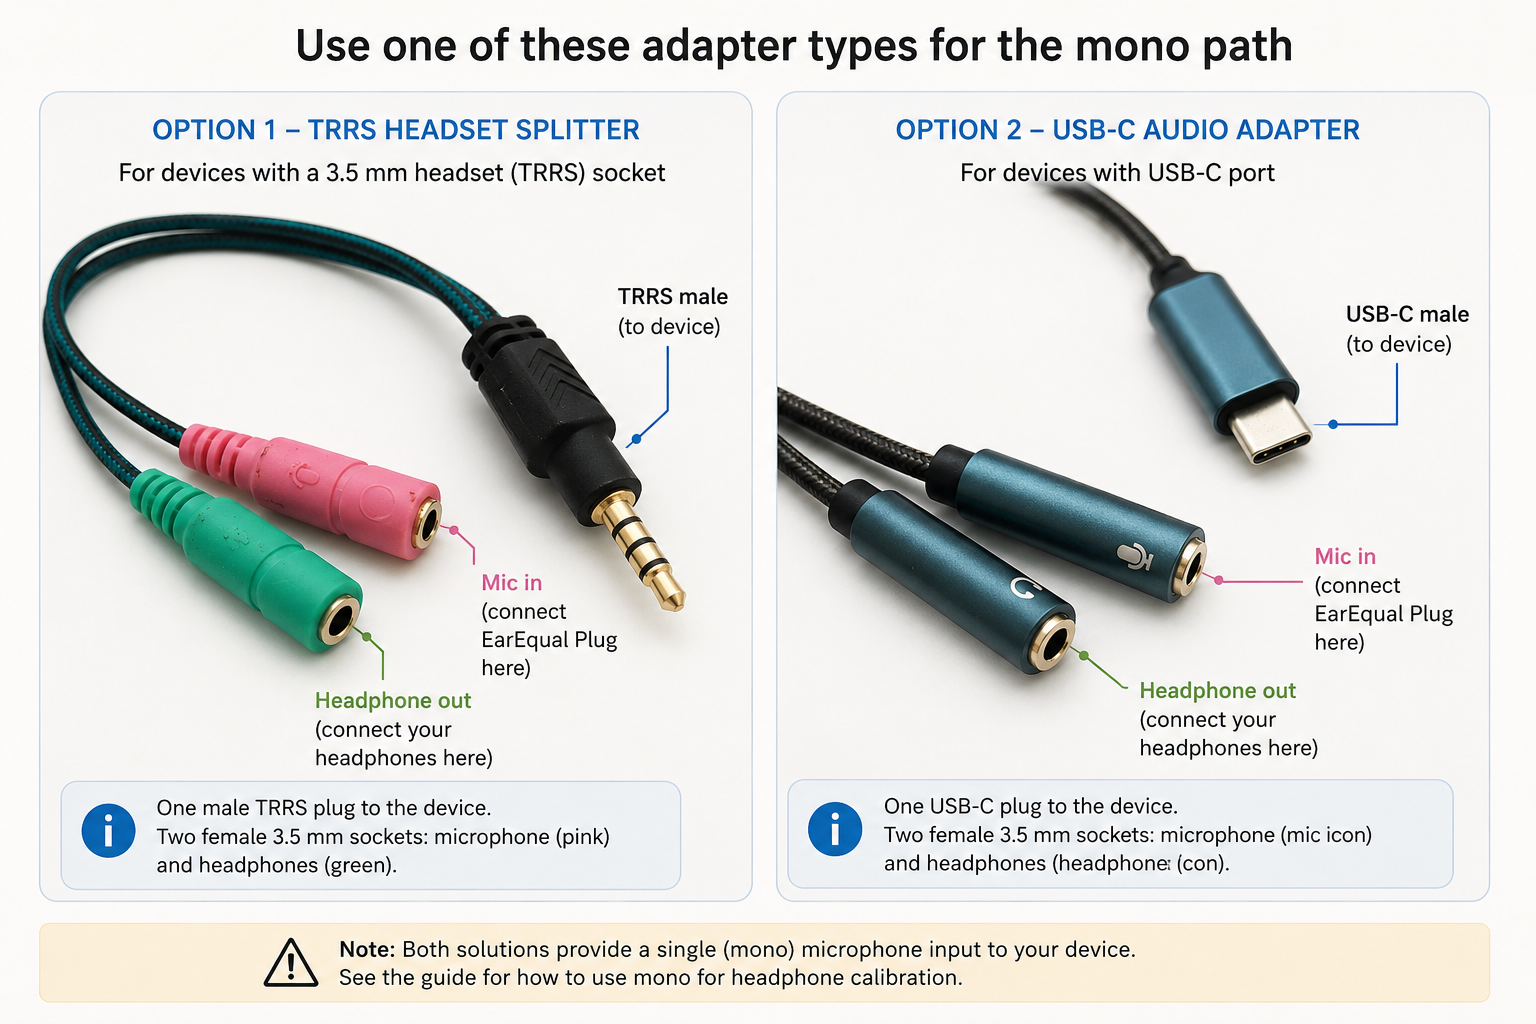
If your computer, phone or tablet has a normal 3.5 mm headset socket, use a 3.5 mm TRRS CTIA headset splitter: one male TRRS plug into the device, with separate female headphone and microphone sockets.
If your device has USB-C instead, use an ordinary USB-C headset audio adapter with stereo headphone output and mono microphone input.
In either mono case, the two EarEqual microphones are electrically combined onto one microphone channel. For headphone calibration this works because the left and right responses are separated by excitation: play the measurement sweep through the left headphone only, then repeat through the right headphone only.
This mono method cannot be used for binaural recording. The left and right microphone signals have already been combined before recording.
Connecting both capsules to one microphone input changes the electrical loading and noise behaviour slightly compared with two independent inputs. For headphone frequency-response measurements this is normally much less important than for recording. Full stereo acquisition remains the preferred setup.
Taking a measurement
- Insert BCR slowly and gently. It is designed to seat without force, never push against pain. Full safety instructions are on the insert in the box.
- Start at a low playback level and raise it gradually. Measurements do not need high listening levels.
- For headphones, measure one ear at a time, then apply the correction you derive for each ear to that ear.
EarEqual BCR is a low-isolation measurement device, not an earplug. You may hear the room through it while measuring, and that is normal, it does not mean BCR is not working.
Care & cleaning
Keep all liquid off the fabric face of the microphone. Clean by wiping with a soft cloth and a little alcohol applied to the cloth, never to BCR.
Full instructions are in the Cleaning & Hygiene Protocol.
For the application workflows, see headphone calibration or binaural recording. Questions about setup or hardware? Get in touch at hello@earequal.com.